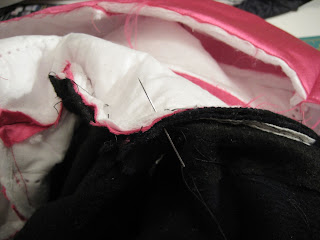
About a year ago, I decided to fix the lining on my pea coat. Every time I put it on, I heard a distinct ripping sound. You can see in the first two pictures the state of things.
So many of my vintage coats have beautiful, heavy weight satin lining that are durable and look gorgeous. The lining in this coat was cheap and too light weight. I decided to replace it with a heavier satin lining in hot pink AND replace the Thinsulate inter-lining that I had paid extra for when I originally purchased the coat from J. Crew. This coat is also a petite, so I didn't have to hem the sleeves. The shell wool is in good condition. There were many reasons for saving this coat... as well as keeping it out of a land fill.
I have the whole step-by-step up on Burdastyle
here, but I will show you some highlights.
 |
| Lining removed |
I did not make marks when I took the lining apart and I should have. The body has side panels and the sleeves are two part sleeves. The front seam of the sleeve appears to line up with the front seam of the side panel, but something happened during my construction phase and these seams did not line up. I will be more careful the next time I re-line something and make more marks. It's an easy step when the lining is still sewn together, but almost impossible once you have ripped the whole thing apart.
 |
| Cutting the new lining |
I bought this coat right before leaving for Berlin in January... a very cold time of the year. I wanted the Thinsulate interlining for extra warmth, so I wouldn't have to add a lot of layers to my wearing or suitcase. I have sewn with Thinsulate before and have worn it many times. I ordered it online from
Seattle Fabrics.
 |
| Thinsulate |
DO NOT IRON THINSULATE!!! An iron will instantly melt the Thinsulate together into a felted mass and will no longer work as designed. If you have a coat with a Thinsulate interlining do not iron it or let your dry cleaner press it.
 |
| Lining in progress with Thinsulate flat-lined to each lining panel. |
I did not take out every seam and remove every button, so there were some bulk issues to work around especially at the back neck. There were also some seam allowances that were not the same which made it even more challenging to sew. I had to use some hand sewing to get the lining in.
I started using leather thimbles in college when I was a sewer in the costume shop. We were often sewing on bulky fabrics or unusual items. Nothing hurts quite like running a needle through your finger eye first, so I adopted the use of a leather thimble then and always keep one on hand.
 |
| The best invention in the world!!! A leather thimble WITH a non-skid metal plate! |
 |
| Back neck seam in-progress. |
This is a production style construction coat NOT a tailored coat, so the lining is attached entirely by machine. As such, there is an opening in the left sleeve through which the entire garment is turned. Crazy but it works! My very first job was as a sample sewer at Nike. All of our lined jackets and coats were constructed this way. It took me several hours to wrap my brain around this construction because the visual modeling in your mind is hard to create. The best way to learn is to try it and see what happens. And don't get frustrated if you get your sleeve linings twisted... it happens to everyone. That is why there are seam rippers.
 |
| Turning the garment... aka sausage stuffing. |
 |
| Garment turned showing opening in left sleeve |
 |
| Done! |


